Replacing Suzuki tail lights can cost somewhere between $55 and $95 per light, depending on the issue. You can save money by taking care of the replacement yourself, or a mechanic can take care of it for you.
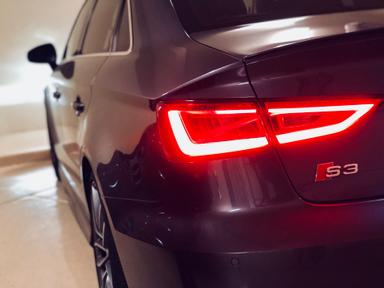
Your Suzuki’s tail lights make it much easier for other drivers to see you on the road, especially in low-visibility conditions. Whether it’s a Swift, a Splash, or a Grand Vitara
, if your tail lights aren’t working properly, you’ll be put at significant risk of getting into a collision—or ending up with a ticket. Luckily, replacing a tail light assembly is usually a pretty quick and straightforward task.
If you’re new to the process, car insurance
comparison and broker app Jerry
is here with a car repair
guide to replacing Suzuki tail lights. Keep reading to learn the steps involved with replacing your tail lights, general costs, and whether to report a busted tail light to your insurance. While we're at it, we'll even show you how to save on Suzuki car insurance costs
. How to replace a Suzuki tail light
Tools needed: Safety glasses, gloves, Philips head screwdriver, replacement part(s)
Before attempting to replace a tail light, it helps to figure out the extent of your problem first.
If just one tail light is affected, you might just be dealing with a burned-out bulb. If both your tail lights are out, you might have a more extensive problem with wiring or a fuse. If you’re not sure what the problem with your tail light is, you can always take it to a mechanic.
But if you think you’ve figured out the issue and it’s that your tail light needs to be replaced, you can reference your owner’s manual to find the right part number based on your Suzuki’s model, year, trim level
, and engine type. Once you’ve rounded up your replacement parts, tools, and safety gear, here are the general steps involved when replacing a Suzuki tail light:
First, disconnect the battery (starting with the negative cable) as a safety precaution to avoid any risk of accidental electrocution.
On most Suzukis, you should be able to open the trunk or liftgate and remove the two bolts that hold the tail light assembly in place.
Gently pull off the tail light assembly toward the rear of the car, being mindful of where its clips are that hold it in place. On a Suzuki Swift, for example, you may need to gently pry behind clips on the top and bottom left corners of the tail light assembly to pull it out.
Remove the bulb socket by twisting slightly to the left or counterclockwise and pulling it out.
Remove the faulty bulb. Some Suzuki tail light bulbs will need to be turned slightly before being pulled out, while some can simply be pulled straight out.
Reinsert the bulb socket into the tail light assembly.
Replace the tail light assembly.
Some Suzukis’ tail lights might have some variance from this, so you’ll want to make sure you understand how yours is set up and the important wire connections it has before getting started.
On some Suzuki SX4 sedans, for example, you wouldn’t need to remove the tail light assembly to access the bulb—you’d just remove some clips on the trunk’s lining and access the tail light bulbs from behind. You’d only need to unscrew the two bolts if you needed to remove the whole tail light assembly.
If a faulty bulb was your only issue, your repair’s done! If you need to replace your entire Suzuki tail light assembly, you may also have to disconnect a wire harness connector to be able to completely remove the tail light assembly. You may need to remove some bolts on the back of the tail light assembly itself, too.
Some tail light assemblies will come with bulbs, while others will require you to buy bulbs separately and insert them yourself, so be mindful of that when ordering your parts.
Pro Tip It’s a good idea to wear gloves when handling your tail light bulbs to avoid getting oils or smudges on them.
Commons reasons for Suzuki tail light malfunctions
Some tail light problems are easier to figure out than others. If you’re not sure what caused yours to stop working properly, these are some common causes for tail light malfunctions:
Burned-out bulb: If your issue is only with one light, you might just be dealing with a burned-out bulb that needs to be replaced.
Damaged or corroded socket: Exposure to moisture can bring about rust or corrosion in your vehicle’s bulb sockets, so look out for signs of damage when replacing a bulb.
Faulty wiring, control switch, or fuses: If replacing your bulb or tail light assembly doesn’t resolve your tail light problem you might have a more extensive problem with a control switch, fuse, or bad wiring.
MORE: How to get an accurate car insurance quote
Does car insurance cover broken tail lights?
Depending on your level of coverage and what caused your tail light to stop working, your car insurance policy might cover a repair, but it often ends up not being worth it for this kind of replacement.
If your car insurance policy has collision coverage
, you might be able to get coverage if your tail light was broken after a collision with another vehicle or a stationary object. With comprehensive coverage
, you’d see coverage for damage caused by events including vandalism, falling objects, or natural disasters. But to see coverage from your insurance company, you’re typically going to have to reach your deductible
amount first. Common deductible amounts are $500 or $1,000. Costs to replace a Suzuki tail light are relatively inexpensive; a single tail light assembly could cost somewhere between $55 and $95.You likely wouldn’t reach your deductible if you replaced one yourself, and for a straightforward tail light assembly replacement, the cost of labor for a mechanic to do it for you might not reach it, either.
If you were to file a claim, there’s also the possibility you could see your insurance rate go up, so in most cases, it ends up being more cost-effective to pay for a tail light replacement out of pocket.
How to find affordable Suzuki insurance
Suzuki drivers pay an average of $1,340 every year for car insurance. But could you be paying less than you are right now? The Jerry
, the trustworthy insurance comparison app
, can help you find out! If you’re new to the Jerry experience, this is how it works. Once you’ve entered your information, Jerry will show you personalized quotes from top car insurance
providers so you can find the lowest rate for the amount of coverage you’re looking for. If you find a better deal, Jerry can even help you with setting up your new policy and canceling your old one.
Getting started takes under a minute, and the average Jerry user saves $887 per year on car insurance!
“I’ve been wanting to switch to Progressive due to their cheaper rates compared to my previous provider. Jerry
was just the help I needed to make the switch. Good company, swift service!” —Jenny B.
RECOMMENDEDThis app is great, but the customer service is even better! Not to mention convenient! My husband and I got the lowest rate (much lower than the rates I was finding online through my own searches), quickly, and pretty much all through text message! Thank you so much for a hassle free experience👍
FAQs


 4.7
4.7
 We value your privacy